HAPPY MONDAY! Welcome to my new series! My thought for Mini-Makeover Monday is to share ideas on how you can update your spaces in small ways, but with big impact. Creating the home you want and love is a process and takes time. Not everyone can, or is willing, to do major updates all at once.
This week I’m sharing an update I recently did to my own fireplace. Let’s dive in.
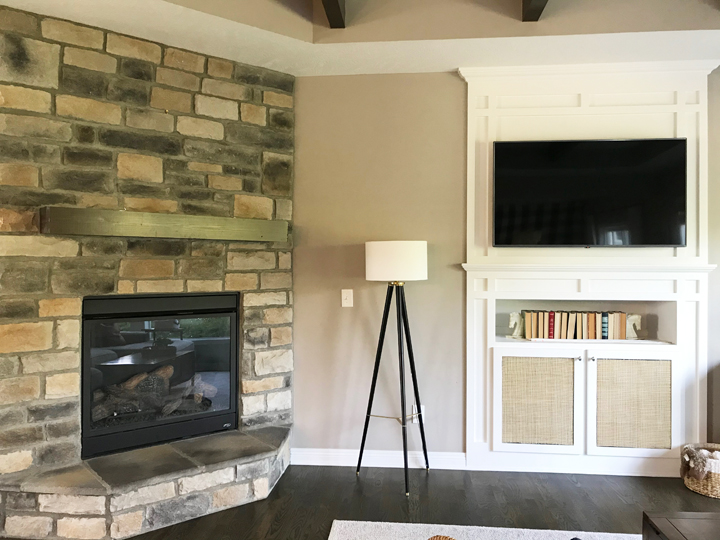
Most days I sit at the kitchen table to work and that spot faces straight out to my great room. Often, I find myself just staring at spaces trying to figure out what it is that is not working for me. One of those spots was the fireplace.
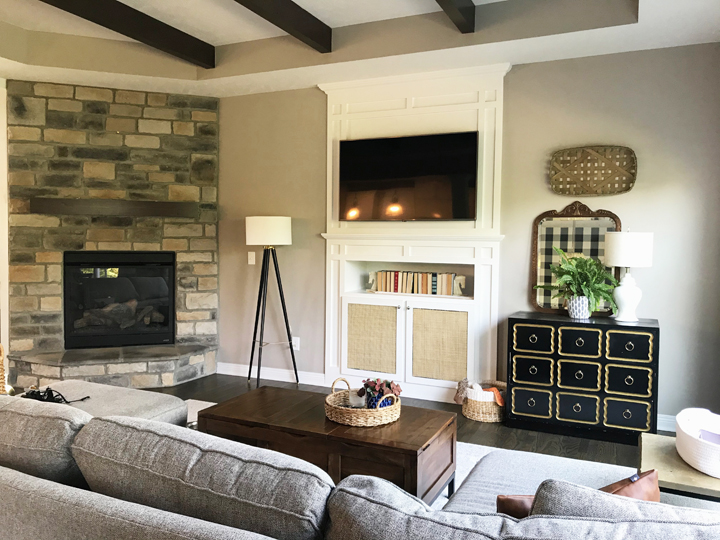
We had the stone fireplace placed in the corner because we wanted a hearth and the only way to have the hearth was to move the fireplace to the corner. Our builder created a double mantle in the space that was suppose to be the fireplace. I love the double mantle look and the built in storage that it created.
However, the corner fireplace is not my favorite location. I have stared at that space for years trying to figure out what it was that bothered me the most. I came to the conclusion that it was the unbalanced look of the heavy stone fireplace next to the lighter double mantle.
A while back, one of my favorite bloggers, Chris Loves Julia, updated their master bedroom fireplace with an over grouted look. It is fabulous by the way! I read through their entire post, while sitting in that same kitchen table spot and wondered if that may just be my answer. You can read how they did this project here.
I pondered it for quite some time, which is something I do often when it comes to my own home. But good gracious am I glad I finally did it. It is beautiful and is exactly what this space needed.
I did this entire project on my own in one day. I will say it is tedious and messy. I did not do a great job setting up for the messes, so I was constantly needing to clean up mortar drips. My hands hurt from all the detailed work holding a brush or shim. But that is normal for me. It happens when I paint as well.
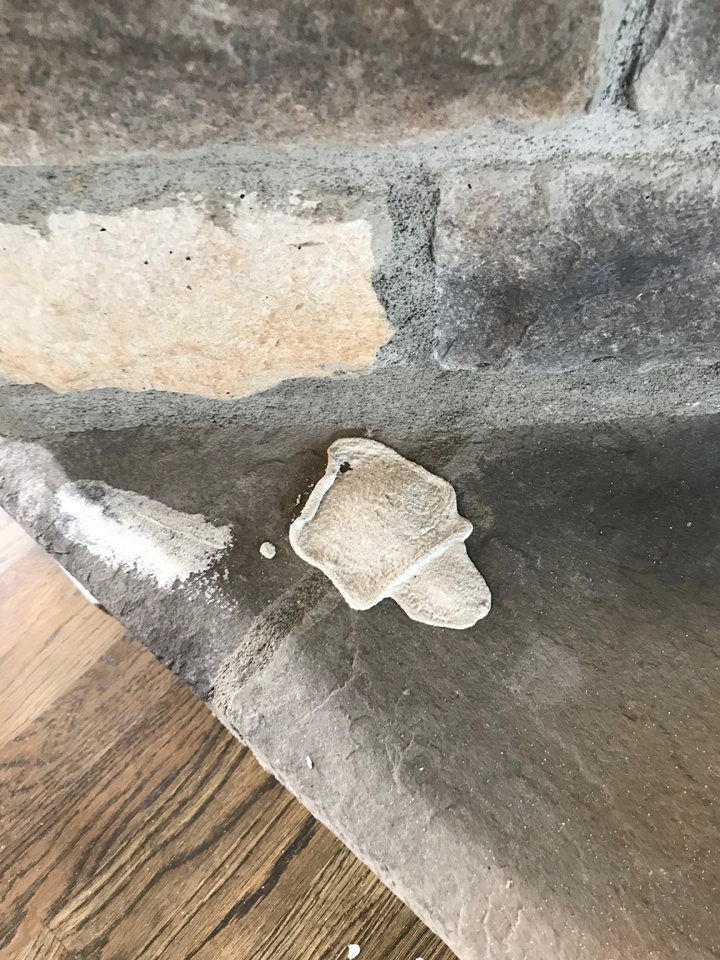
Oops.
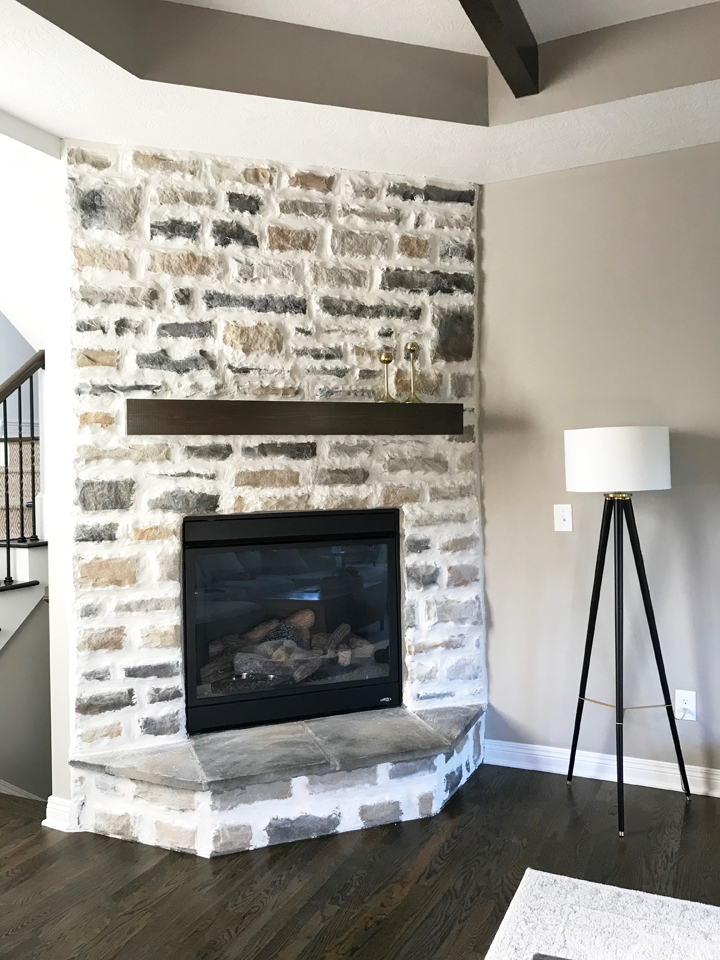
I will also confess, that I may have sorta-kinda freaked out when I was done. I was going for a white-ish look and it looked pretty grey. I may have contacted my friend who is a very talented faux finisher to see if it could be salvaged. I was convinced it was going to dry darker…ya know…like paint does. She gave me some tips on what I could do.
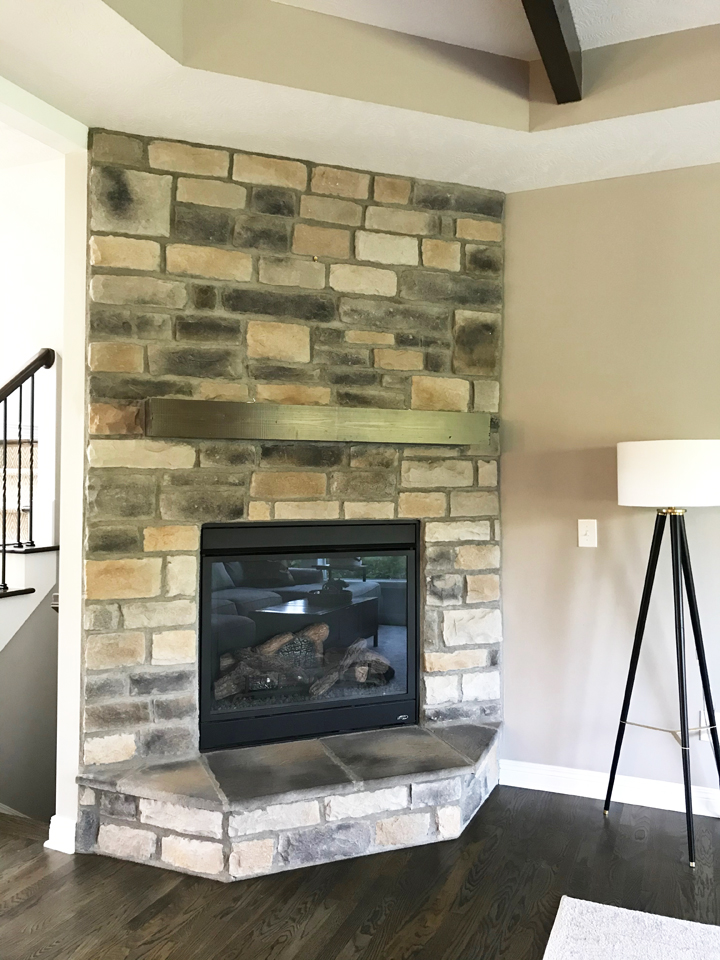
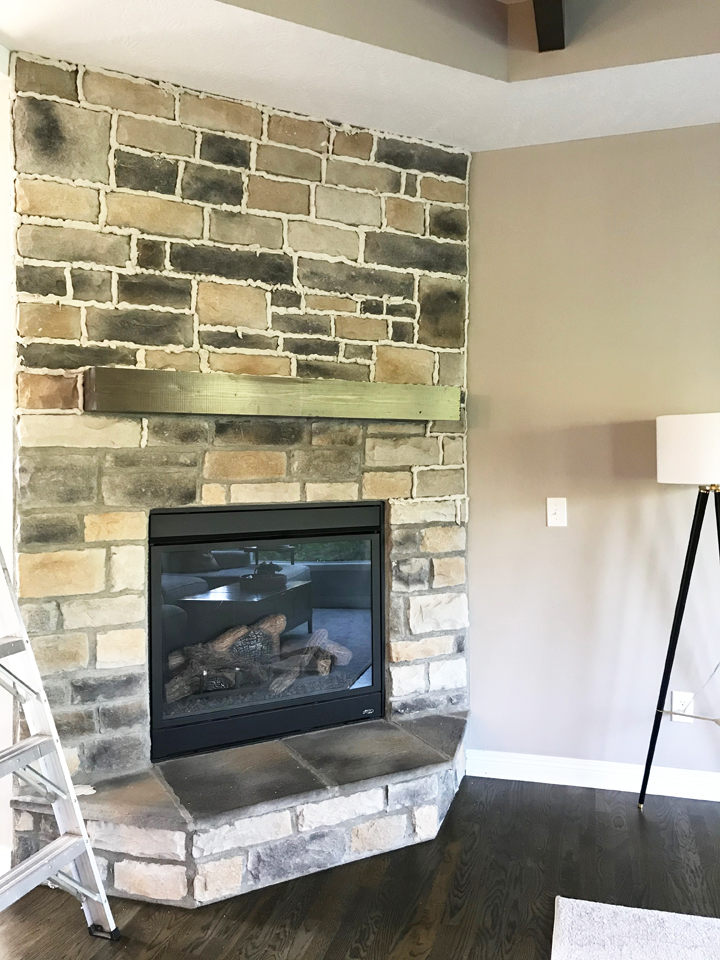
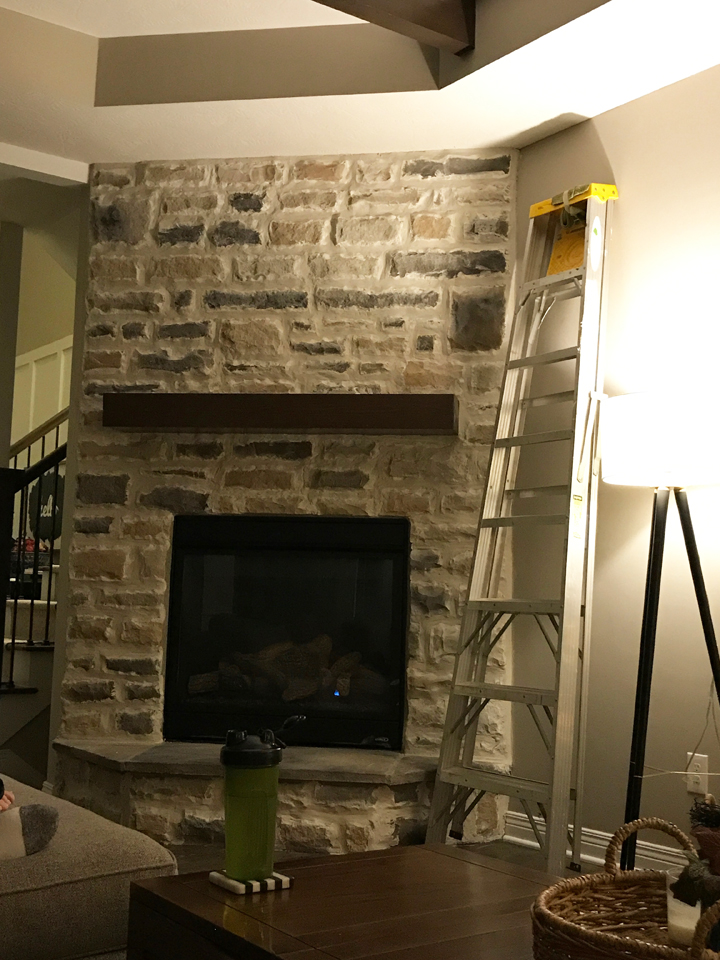 It was dark when I finished, hence the terrible photo.
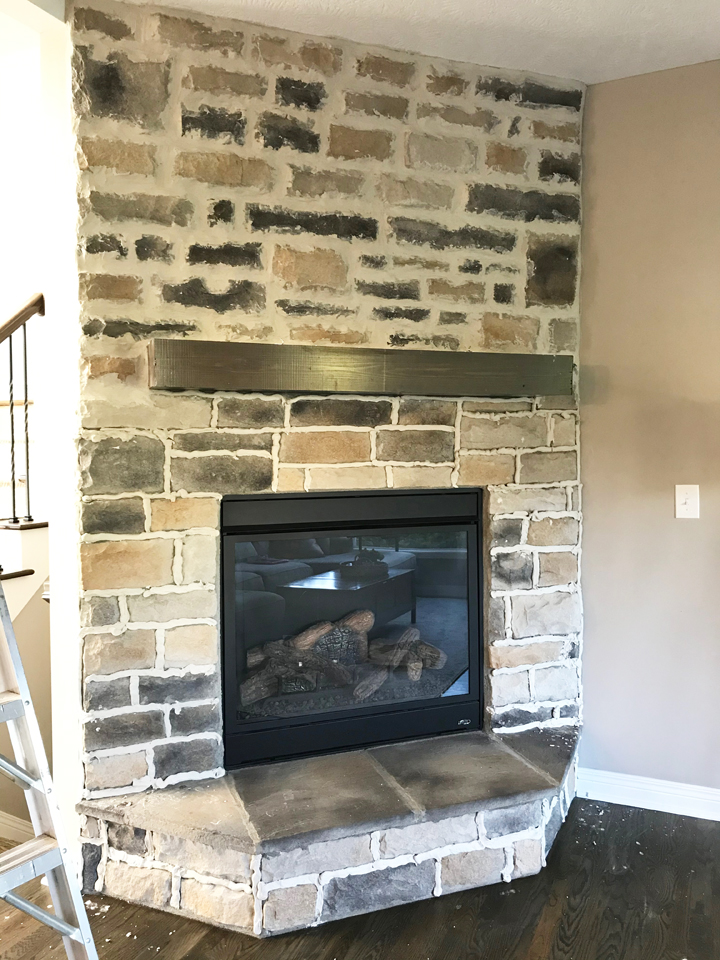
But, as it started to dry, it was drying lighter…phew! By the next morning it looked so beautiful. I still just stare at it lovingly…HA! That’s when you know you’ve made a good decision.

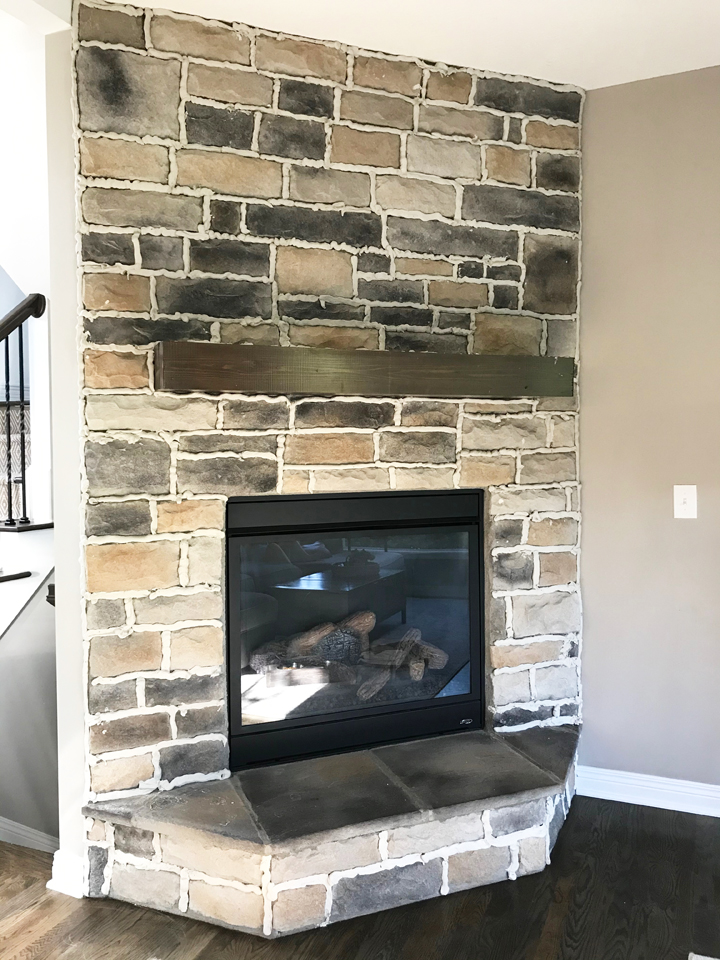
And how about a before and after?
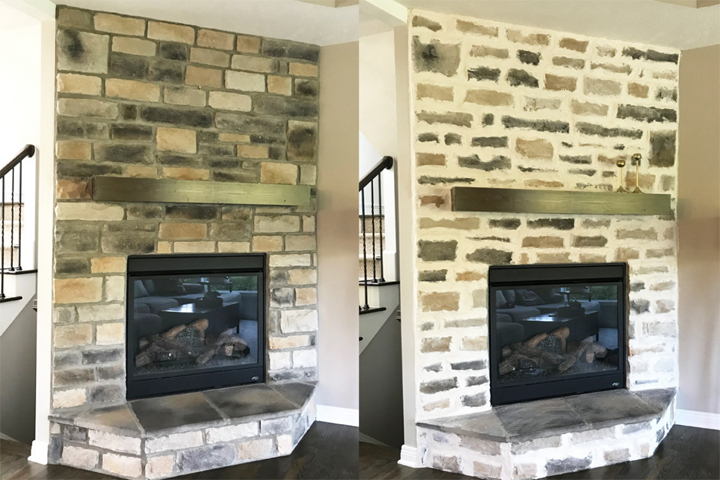
Cost: $100
Time: 8 Hours
Impact: This project was totally worth it for the effort involved. It created the balance I was wanting for the space, so much more interest and character… and all the heart eyes.
I hope you enjoy this new series and it ignites some inspiration for your own home. Create a home you love!


0 Comments